
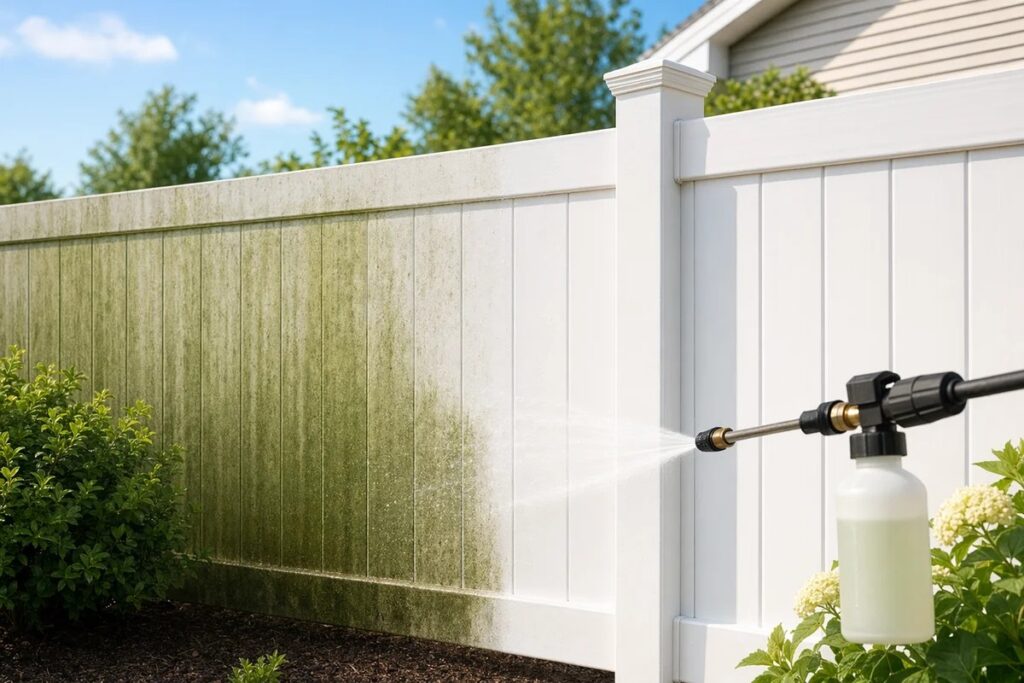
What vinyl fence cleaning really means and why stains come back
Vinyl fence cleaning is the process of removing surface dirt plus organic growth like mold and algae, and improving the look of color when oxidation leaves a chalky film. Many recurring stains come from shade, moisture, sprinklers, and airborne grime that builds up faster than you notice. In other words, cleaning is not just making it “look better”, it is removing what is actively bonding to the surface.
This guide focuses on the three issues homeowners run into most often:
- Mold and mildew spots, usually black or dark specks that cluster in damp areas
- Algae film, a green cast that spreads across panels in shade and humidity
- Oxidation, a chalky white residue or dulling that can make a fence look tired (especially white vinyl)
Set your expectations: many fences clean up with gentle soap, water, and a soft brush. If staining is heavy, you may need a targeted cleaner, a second pass, or simply more frequent rinsing in the trouble spots.
Get set up: supplies for cleaning a vinyl fence without scratching it
Before cleaning a vinyl fence, do a quick reset: choose a mild day, move patio items away, pre-wet nearby plants, and protect landscaping from runoff if you plan to use stronger solutions. The rule of thumb is simple: start with the gentlest method first, then step up only if stains remain after rinsing and light scrubbing.
Simple DIY cleaner recipes for vinyl fencing
You do not need a complicated chemical lineup to learn how to clean vinyl fencing. Start with a basic wash, then escalate only where needed:
- Everyday wash: Warm water plus a few drops of dish soap in a bucket or pump sprayer for routine dirt, pollen, and road dust.
- Mold and algae option: An oxygen bleach solution (follow label directions) for organic staining, often with less odor than chlorine bleach.
- If you choose diluted chlorine bleach: Use a mild dilution, keep it off plants, do not mix with other cleaners, spot-test first, and rinse thoroughly so residue does not streak.
| Cleaner | Best for | Notes |
|---|---|---|
| Dish soap + water | Dust, mud, pollen | Safest starting point, great for routine rinses |
| Oxygen bleach | Green algae film, some mildew | Follow label directions, do not let it dry on the fence |
| Diluted chlorine bleach | Stubborn mold spots | Use cautiously, protect plants, rinse very well |
Tools that make the best way to clean a vinyl fence easier
The best way to clean a vinyl fence is usually more about the right tools than stronger chemicals. A few basics go a long way:
- Soft-bristle brush or non-scratch sponge
- Microfiber cloths for final wipe checks
- Garden hose with a spray nozzle
- Extension pole for tall panels, so you do not grind grit into the surface while reaching
Avoid common damage sources like steel wool, abrasive pads, and harsh solvents. They can scratch the vinyl or leave it looking permanently dull.
Step-by-step: how to clean a vinyl fence from top to bottom
If you have been searching for how to clean a vinyl fence without leaving streaks, the order matters. Work top-down, keep surfaces wet, and rinse thoroughly between steps.
- Rinse first: Hose down the fence from top to bottom to remove loose grit that can scratch during scrubbing.
- Apply your mild cleaner: Work in 4 to 6-foot sections so solution does not dry on the surface.
- Scrub gently: Use light pressure, small circles on textured areas, and long strokes on flat rails and posts.
- Let it dwell briefly if needed: Give cleaner time to work on stains, but do not let it dry (especially in sun).
- Rinse thoroughly: Rinse top-down until runoff is clear and the slippery “soap feel” is gone.
- Spot-treat remaining stains: Switch to a stronger, vinyl-safe option for mold, algae, or oxidation only where needed.
- Final rinse and walk-through: Check shaded sections, sprinkler-hit areas, and the fence line near soil and mulch, this is where regrowth starts.
Rinse and scrub method for routine vinyl fence cleaning
This method is best for dust, cobwebs, mud splatter, pollen, and general dinginess. Start at the top rail, clean posts last (they collect the most drip marks), and change your water if it gets gritty so you are not rubbing sand across the surface. Air-drying is fine, wipe down only if hard-water spotting is common in your area.
Using a pressure washer on vinyl fencing, safely
A pressure washer can help when you have a lot of fence to rinse quickly, or when you want to lift surface grime before brushing. To avoid damage, use a wide fan tip, keep a safe distance, spray along the length of the panels, and never force water into seams or under post caps. Pressure washing alone can leave shadow stains, and a quick hand scrub afterward often makes the difference.
Stubborn growth: how to remove mold from a vinyl fence and treat algae
Knowing what you are fighting helps. Mold and mildew are usually black or dark specks, while algae is commonly a green film that spreads in damp, shaded areas. The key principle is that organic growth often responds best to cleaners that break down biological material, plus adequate dwell time and thorough rinsing.
Mold and mildew spots: dwell time and rinse strategy
For spotty staining, step up your method instead of scrubbing harder. Spray your chosen cleaner on the stained areas, let it sit briefly, then agitate with a soft brush and rinse. If the stain is still visible, repeat the cycle, repeated light passes are safer than one aggressive scrub that leaves shiny scuff marks.
Work smart by tackling the shadiest, north-facing sections first since they are typically the worst. To prevent streaking, always rinse from top to bottom so dirty runoff does not dry on freshly cleaned panels.
Green algae film: when to step up to oxygen bleach
Oxygen bleach is often effective for algae: apply it, allow a short dwell time per the label, lightly brush, then rinse well. If algae returns quickly, look for constant moisture sources like sprinklers hitting the fence, mulch piled against the bottom rail, or poor drainage along the fence line.
Chalky haze and yellowing: how to clean a white vinyl fence and remove oxidation
Oxidation looks like a dull finish and a chalky residue that rubs off on your hand or cloth, especially on sun-exposed sections. This is why how to clean a white vinyl fence can be different from cleaning dirt or algae, oxidation is a surface breakdown, not just something sitting on top.
Oxidation removal checklist and vinyl-safe finishing touches
If you are trying to remove oxidation from vinyl fence panels, patience wins:
- Start gentle: Wash first with soap and water, then test a small area with a vinyl-safe oxidation remover or a cleaner designed for exterior plastics.
- Use light pressure and multiple passes: Oxidation often comes off gradually, aggressive scrubbing can create uneven shine that is hard to “blend” later.
- Finish with a check: Rinse thoroughly and wipe with a clean microfiber to see if chalk transfers. Repeat only where needed, usually on the sunniest sections.
How often to clean a vinyl fence and how to keep it cleaner longer
For most homes, plan to rinse and lightly wash 1 to 2 times per year. Clean more often if the fence is shaded, near trees, next to busy roads, or regularly hit by sprinklers. Spot-cleaning beats marathon cleaning, a 10-minute monthly rinse on problem sections can prevent heavy mold, algae, and oxidation buildup.
Seasonal schedule: shaded yards, sprinklers, humid climates
If you live in a humid climate or have a shaded property, quarterly rinses plus a deeper clean in spring and late summer usually keeps growth under control. For sprinkler zones, adjust heads to avoid constant misting, it can feed algae and may leave mineral spotting on panels and posts.
Prevention tips that reduce mold, algae, and oxidation
Trim vegetation for airflow, keep mulch and soil from touching the bottom rail, and improve drainage so water does not sit along the fence line. One quick habit that helps: rinse after mowing and string trimming to prevent grass stains and grime from bonding to the surface.
Vinyl fence cleaning FAQs
These quick answers can save you time (and prevent accidental damage) before you start mixing cleaners or firing up a pressure washer.
Can I use bleach to clean a vinyl fence?
Yes, but it should be a last-step option after soap and water. Use a mild dilution, protect nearby plants, never mix bleach with other cleaners, spot-test first, and rinse thoroughly so residue does not streak.
What is the best way to clean a vinyl fence with a pressure washer?
Use a wide fan tip, keep a safe distance, and treat the washer like a rinse tool, not a paint stripper. Pre-soak with a gentle cleaner when needed, then finish with a soft brush on any remaining shadow stains.
How do I remove oxidation from vinyl fence without damaging it?
Wash first, then test a vinyl-safe oxidation remover on a small section. Use light pressure, multiple passes, and thorough rinsing to avoid patchy shine, focusing on the sunniest sections where chalking is worst.
How often should you clean vinyl fencing?
Most homeowners can wash 1 to 2 times per year, but shaded, damp, or sprinkler-exposed fences may need quarterly rinses plus seasonal deep cleaning. Consistent light maintenance is usually the easiest form of vinyl fence cleaning.
When should I stop DIY and hire help for vinyl fence cleaning?
Consider help if mold or algae covers large sections, oxidation keeps returning after cleaning, or you cannot safely reach tall areas. A pro can speed up the work, choose vinyl-safe cleaners, and avoid damage from overly aggressive pressure washing.
If cleaning reveals bigger issues, plan your next step
Sometimes a deep wash is the moment you notice problems that cleaning cannot fix, like leaning posts, cracked rails, or sections that are warping from age and sun. If you are thinking about fence repair or exploring new fence options, it can also help to look at examples in the fence and outdoor project gallery. You can request a free consultation and free estimate (and ask about financing options) through Decks, Fences and Sheds. It is a simple way to get clarity on whether your fence just needs maintenance, or it is time for an upgrade.
